Db_capture
The db_capture utility is a graphical interface program that enables you to take a "snapshot" of the current channel values in a database, so that you can restore them later.
To start db_capture, enter the following at the system prompt:
db_capture [qualifiers] [parameters]
Parameters
The db_capture utility allows up to 128 [channellist] parameters, which can be either channel names or input files that contain lists of channels. These parameters are the channel sources that the utility monitors. If you leave the [channellist] parameter blank, the window starts up with no channels in its channel list. You can specify multiple input files on the command line.
Qualifiers
You can use the following qualifiers, preceded by a "/" or "-" character, with the db_capture command:
comment
Use the comment qualifier to enter text describing the snapshot file. This text appears in the Comment field of the Snapshot Save and Restore Utility dialog and as the first line in the file of a snapshot. For example:
db_capture -snap -comment="first phase"
confirm
Use the confirm qualifier if you want a confirmation message to appear for each restore request.
dir
Use the dir qualifier to specify the directory and the extension from which to scan or store the snapshot files. You can specify an extension for the file if you don't want the default extension .snp. The directory and extension you enter with this qualifier appear in the Filename field of the dialog. For example:
db_capture -dir=c:\db\message\*.snp -file=snap.snp chan1, file1, ...
file
Use the file qualifier to specify the filename that appears in the Filename field of the Snapshot Save and Restore Utility dialog. This file will contain the snapshot. You can specify an extension for the file if you don't want the default extension .snp. Note that if you specify a file extension with the dir qualifier, this extension is used for the file.
To use the file qualifier, you also need to specify channel names or input files in the parameter list. For example:
db_capture -file=snap.snp channel1, file1, ...
You can also use the wildcard asterisk (*) character in this parameter list. For example, if you want to capture all of the channels in the local database FACILITY_DB , enter
db_capture -file=snap.snp FACILITY_DB::*
If you have a specific list of channels that is rather long, you may want to create a simple ASCII file containing a list of channel names. Make sure that the file contains only one channel name per line, with no extra lines. Suppose, for example, a file called channellist.txt contains the following two lines:
FACILITY_DB::BINARY*
CACTUSDB::*
To use this file as an input list, enter:
db_capture -file=snap.snp channellist.txt
This command records all channels in FACILITY_DB that start with the word BINARY and all of the channels in the CACTUSDB database. The values in the channel list are stored in the file snap.dat when you click the Snap button on the Snapshot Save and Restore Utility dialog.
height
Use the height qualifier to specify the height, in pixels, of the Snapshot Save and Restore Utility dialog when it appears. The minimum height is 100.
match
Use the match qualifier to specify whether the filename and the comment in the Filename and the Comment fields match the selected entry in the list box area.
restore
To restore the contents of the snapshot file to the database (that is, returning the database values to those when the snapshot was taken), enter the restore qualifier and the name of the file you want to restore. For example:
db_capture -restore -file=snap.snp -dir=c:\db\message
where c:\db\message is the directory and snap.snp is the file containing the snapshot. If you want to change any values in the snap.dat file, edit the file with a standard text editor.
Caution Restoring a snapshot of the database causes instant changes in the channel values of the database. Make sure that any instruments attached to the saved channels can handle these jumps.
|
You can use the file and dir qualifiers with the db_capture -restore command.
snap
To use the snap qualifier, enter the name of the output file and the channels you want to capture. For example:
db_capture -snap -dir=c:\db\message\*.snp -file=snap.snp channel1, file1
You can use the comment, dir, and file qualifiers with the db_capture -snap command.
title
Use the title qualifier to specify a title in the title bar of the Snapshot Save and Restore Utility dialog.
width
Use the width qualifier to specify the width, in pixels, of the Snapshot Save and Restore Utility dialog when it appears. The minimum width is 100.
x
Use the x qualifier to define where the upper left corner of the Snapshot Save and Restore Utility dialog starts on the x-axis.
y
Use the y qualifier to define where the upper left corner of the Snapshot Save and Restore Utility dialog starts on the y-axis .
Snapshot Save and Restore Utility
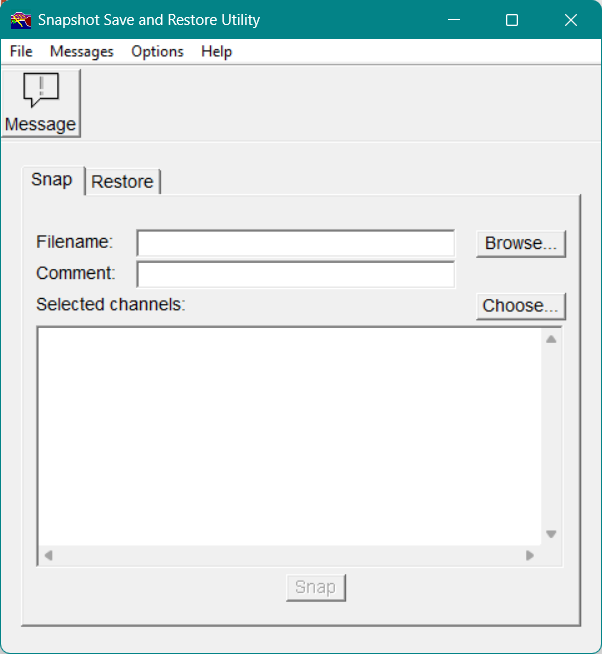
After you start db_capture, the Snapshot Save and Restore Utility dialog appears, as shown in Figure 5.
You can use the Snapshot Save and Restore Utility dialog to record the current channel values of a database and then restore them later. The following section describes how to use the dialog to perform these tasks.
Figure5 - Snapshot Save and Restore Utility dialog
Snapping the Channel Values in the Database
Use the options on the Snap tab to perform a snapshot of the channel values in a database.
Filename
Enter the name of the file containing the snapshot information. You can specify an extension for the file if you don't want to use the default extension .snp. You can also use the Browse button to select a file to record.
Comment
Enter text to describe the snapshot file selected. This text then appears as the first line in the snapshot file.
Selected channels
This list box displays the channels selected for snapshot.
To change the channels listed in the Selected channels list box
Click the Choose button.
Figure6 - Select Channel dialog
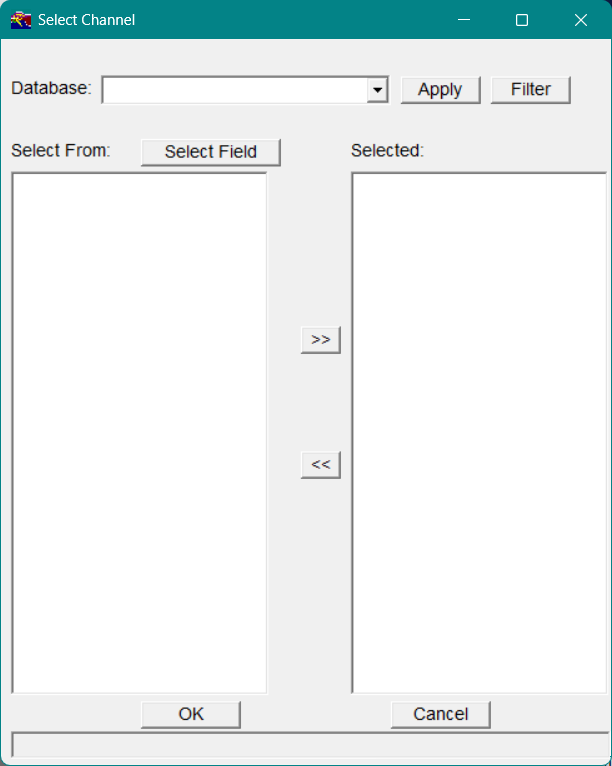
The Select Channel dialog appears, as shown in Figure 1-2. In the Select Channel dialog, you can move channels between the Select From list box and the Selected channels list box.
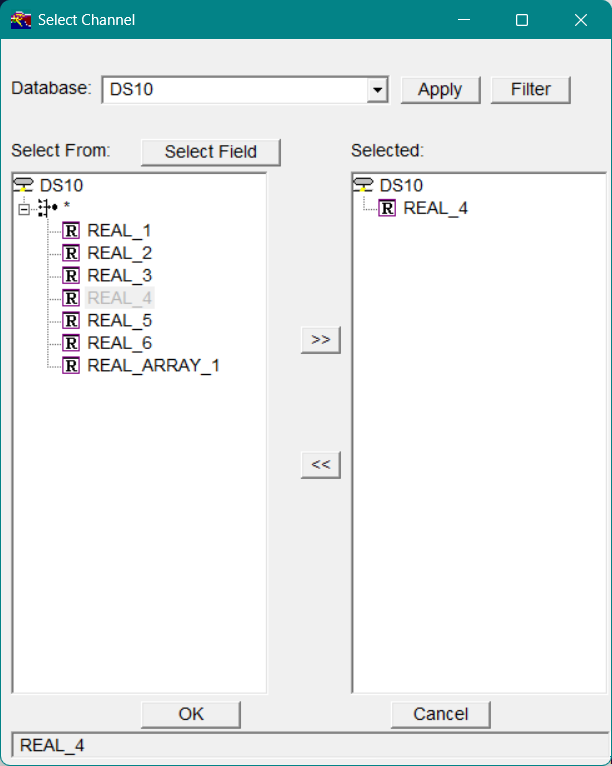
In the Database field, enter the database name.
-or-
Click the down arrow  to select a database name.
Select the channels you want to snap and click the  button.
The channels you select now appear in the Selected list box.
Click OK .
The selected channels now appear in the Selected channels list box of the Snapshot Save and Restore Utility dialog.
You can also click the Filter button on the Select Channel dialog to further specify which channels to display.
After specifying which channels to snap, click the Snap button below the list box on the Snapshot Save and Restore Utility dialog to start the snapshot.
Note Although you can highlight a channel in the Selected channels list box by clicking on it, this has no effect on which channel(s) will appear in the snapshot; all of the channels displayed in the list box are automatically selected for the snapshot.
|
Restoring the Channel Values in the Database
On the Restore tab of the Snapshot Save and Restore Utility dialog, shown in Figure 7, specify the information to restore the channel values of a database.
Figure7 - Restore tab
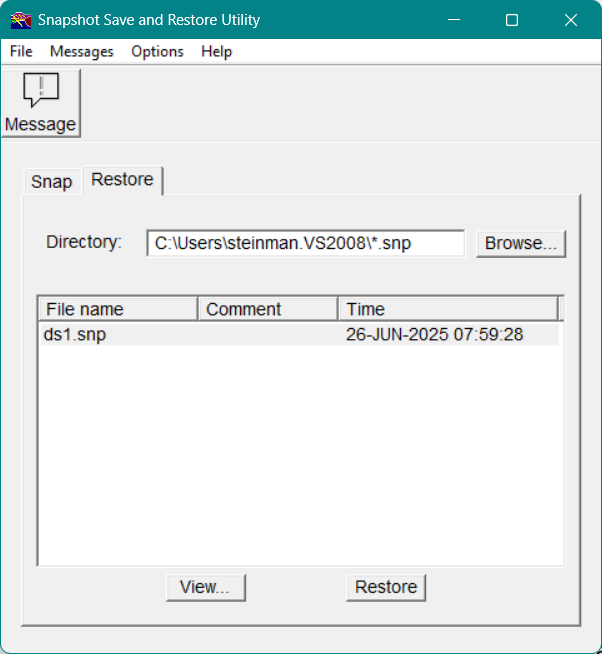
Directory
Enter the directory path (with the extension .snp) for the files in which you want to scan and store the snapped channel values. (You can enter a different file extension if you do not want to use the default extension .snp.) When entering the directory path, you can also use the  button to make your selection.
When the directory path is specified for the snapshot files, the list box displays their filenames, along with their comments and creation times.
View
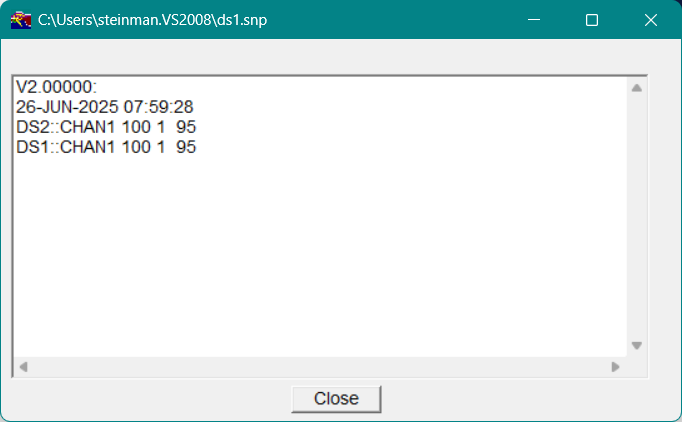
To review the snapped data in a snapshot file, select the filename in the list box and then click View .
Restore
After reviewing the snapped data, click Restore to restore it.
Confirming the Restore
On the Options menu in the menu bar, select Confirm Restore to enable the confirmation of each intended restore. If you select this option, each time you try to restore the recorded channel values, a Confirmation dialog appears, in which you can confirm the restore.
Viewing the Messages
Use the Message List window to view the error messages reported during your operation of the Snapshot Save and Restore Utility dialog.
To open the Message List window
-
On the toolbar, click the Message button.
-or-
-
On the Messages menu in the menu bar, select Open Message Window .
The Message List window appears automatically whenever a message is generated. If your process is generating numerous messages and you want to avoid the interruptions, you can elect to keep this window closed; it will continue to log messages as they are generated.
To keep the Message List window closed
-
Click the Keep Closed option at the bottom of the Message List window.
-or-
-
On the Messages menu in the menu bar, select Keep Closed.